...
...
...
...
...
...
...
...
...
...
...
...
...
...
| Table of Contents |
|---|
Active Assets
CyberCNS supports Deep scans of the network and discovers all active assets such as Routers, Switches, Access Points, Virtual Machines, Desktops, Laptops, Servers, and a few supported Printers. All discovered assets will further allow for a deep dive view and feature an easy-to-view 3-pane user interface layout released with CyberCNS V3.0. All the devices that are discovered using discovery settings for a company will appear here. Also, all tables under Asset details will have the “download as XLSX” option available. Even if the Assets are not shown under active assets after the scan is completed. Please refer Jobs
...
Bell icon indication is shown for Critical vulnerable assets. The Notification will be gone if you close it manually or the application is remediated. It will reappear again once you refresh the page or log out and log in again.
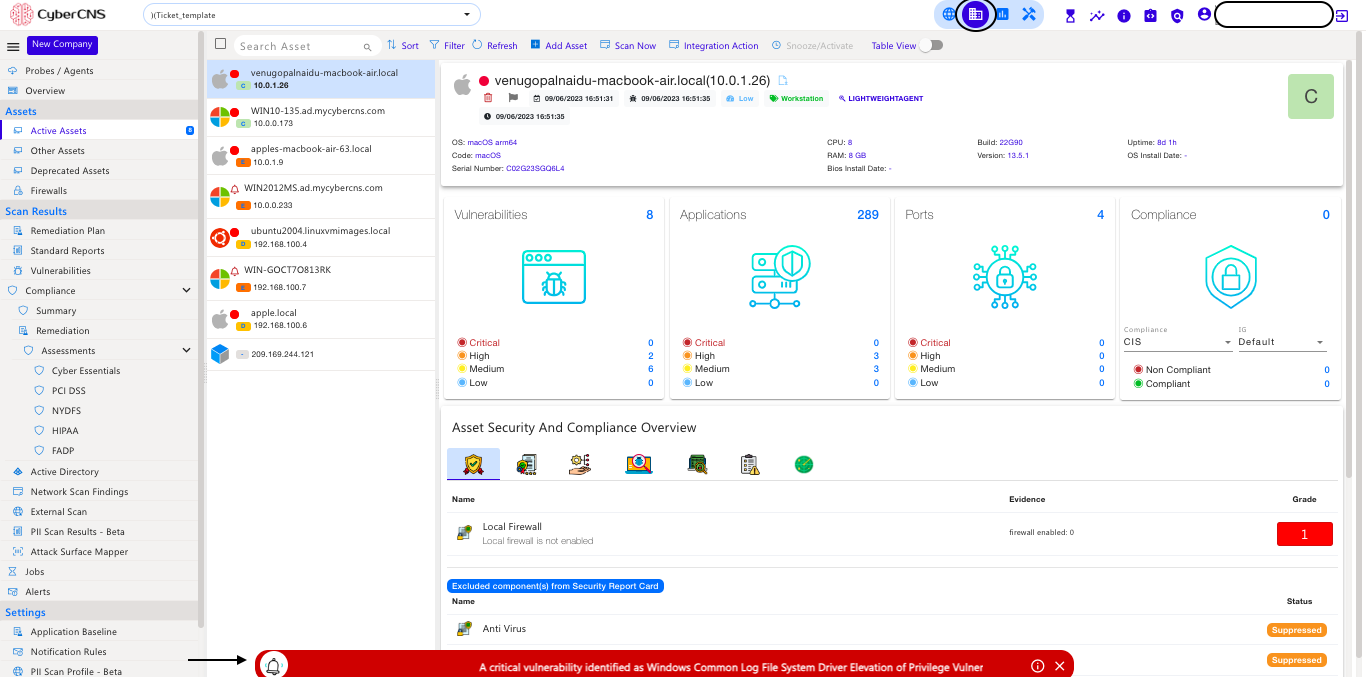
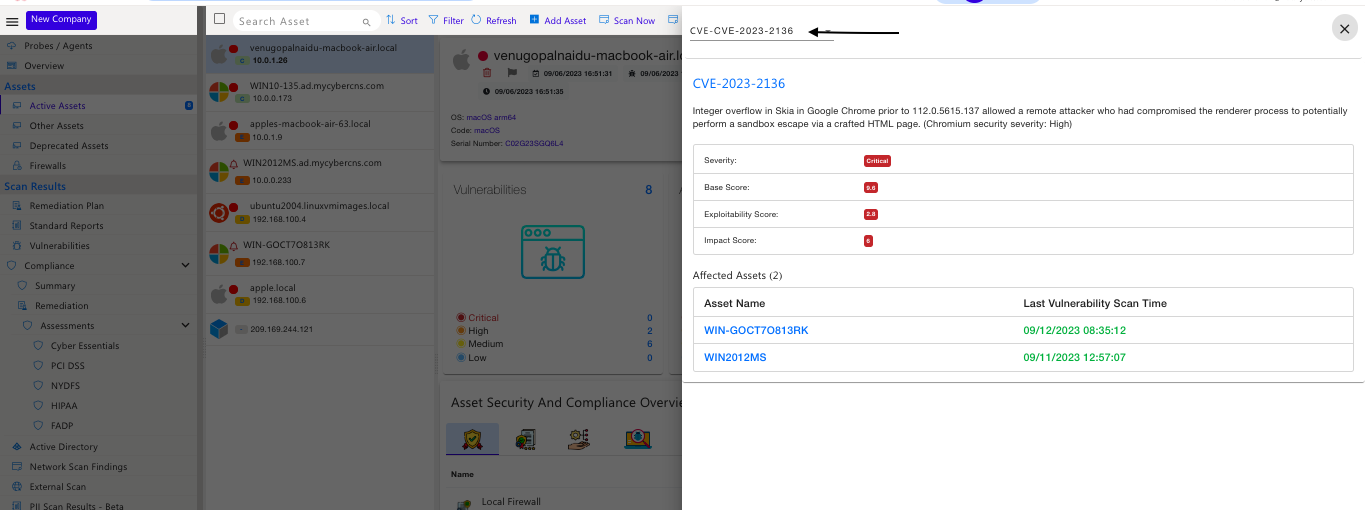
Here next if you click on that notification, it will open a CVE database search and show the affected assets.
Add/Update Credentials
Add/Update Credentials can be applied to online assets.
Add/Update Credentials for an individual asset as shown below. Select the OS type from the drop-down. The current choice of OS available includes Windows, Linux, VMWare, Darwin (Mac OS), and Network Devices.
...
Step 1: Stop agent services
net stop cybercnsagentmonitor
net stop cybercnsagentv2
Step 2: Navigate to the agent nmap folder and install npcap and VC_redist x86 manually.
C:\Program Files (x86)\CyberCNSAgentV2\nmap
Run the Npcap OEM executable
Run the VC_redist x86 executables
Step 3: On successful installation initiate a scan in the Cybercns portal.
...
Step 1: Stop agent services
net stop cybercnsagentmonitor
net stop cybercnsagentv2
Step 2: Uninstall the npcap / pcap driver from the agent machine
...