There are three steps to get you started. Sign up, Install Agent and Setup scope for Vulnerability Scan. Let us look at these one by one.
Sign up
To sign up for an account of the ConnectWise Vulnerability Scanner, browse https://mysecuritykarma.com.
- Provide the basic details such as First Name, Last Name, User id (email), Domain of your entity and the Company name.
- A validation mail will be sent to the email provided by you. On completion of the validation, an account will be created for you which you can log in using <company name>.mysecuritykarma.com/login.
Install the Agent
To install the agent you must be on a Windows server in which you have admin permissions.
- Browse the mysecuritykarma portal https://<company name>.mysecuritykarma.com/login --> My Company --> <company name> Download Agent tab
- Download the Agent (CW-VulnerabilityScanner.exe).
- Right button down on the downloaded agent exe and select "Run as Administrator". This will install the Agent.
...
Setting up your environment for Scanning
Windows machines are accessed using WinRM. WinRM is enabled by default on server editions from Windows 2012. However it needs to be enabled on the desktop operating systems and older server editions such as WIndows 2008 R2.
How to enable WinRM on Windows servers & clients
About
WinRM is a Microsoft implementation of WS-Management Protocol. Read more
It allows for better inventory of systems running Windows compared to WMI and is relatively easy to setup. It can be done through a GPO in your Active Directory.
How to enable WinRM
WinRM is enabled by default on Windows Server 2012 R2 but disabled on all client operating systems earlier than Windows Server 2012.
For Windows XP and Windows Server 2003 (both are EOL) you must install “Windows Management Framework Core package (Windows PowerShell 2.0 and WinRM 2.0)” to enable WinRM support.
WinRM can use both HTTP (port 5985) and HTTPS (port 5986). This guide will focus on HTTP since it does not require installation of certificates on the target machines.
We will enable WinRM through a GPO which is the easiest way to enable all machines in your domain to accept connections through WinRM. There are a few steps that need to be completed for WinRM to work:
- Create a GPO
- Configure the WinRM listener
- Automatically start the WinRM service
- Open WinRM ports in the firewall
Create a GPO
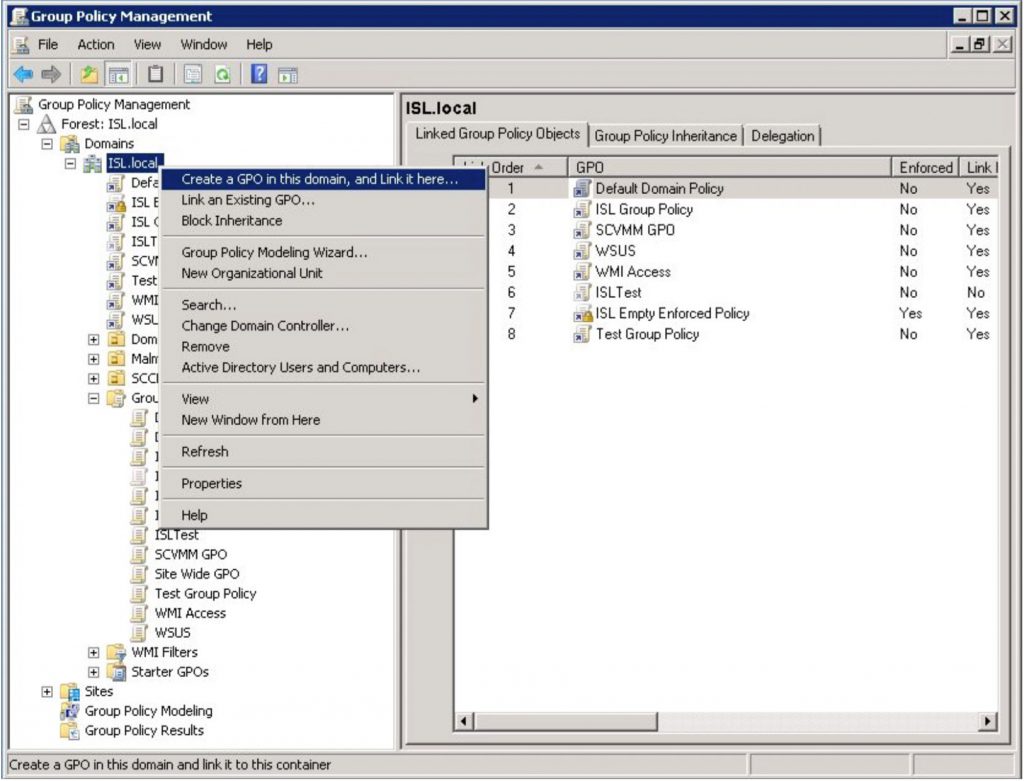
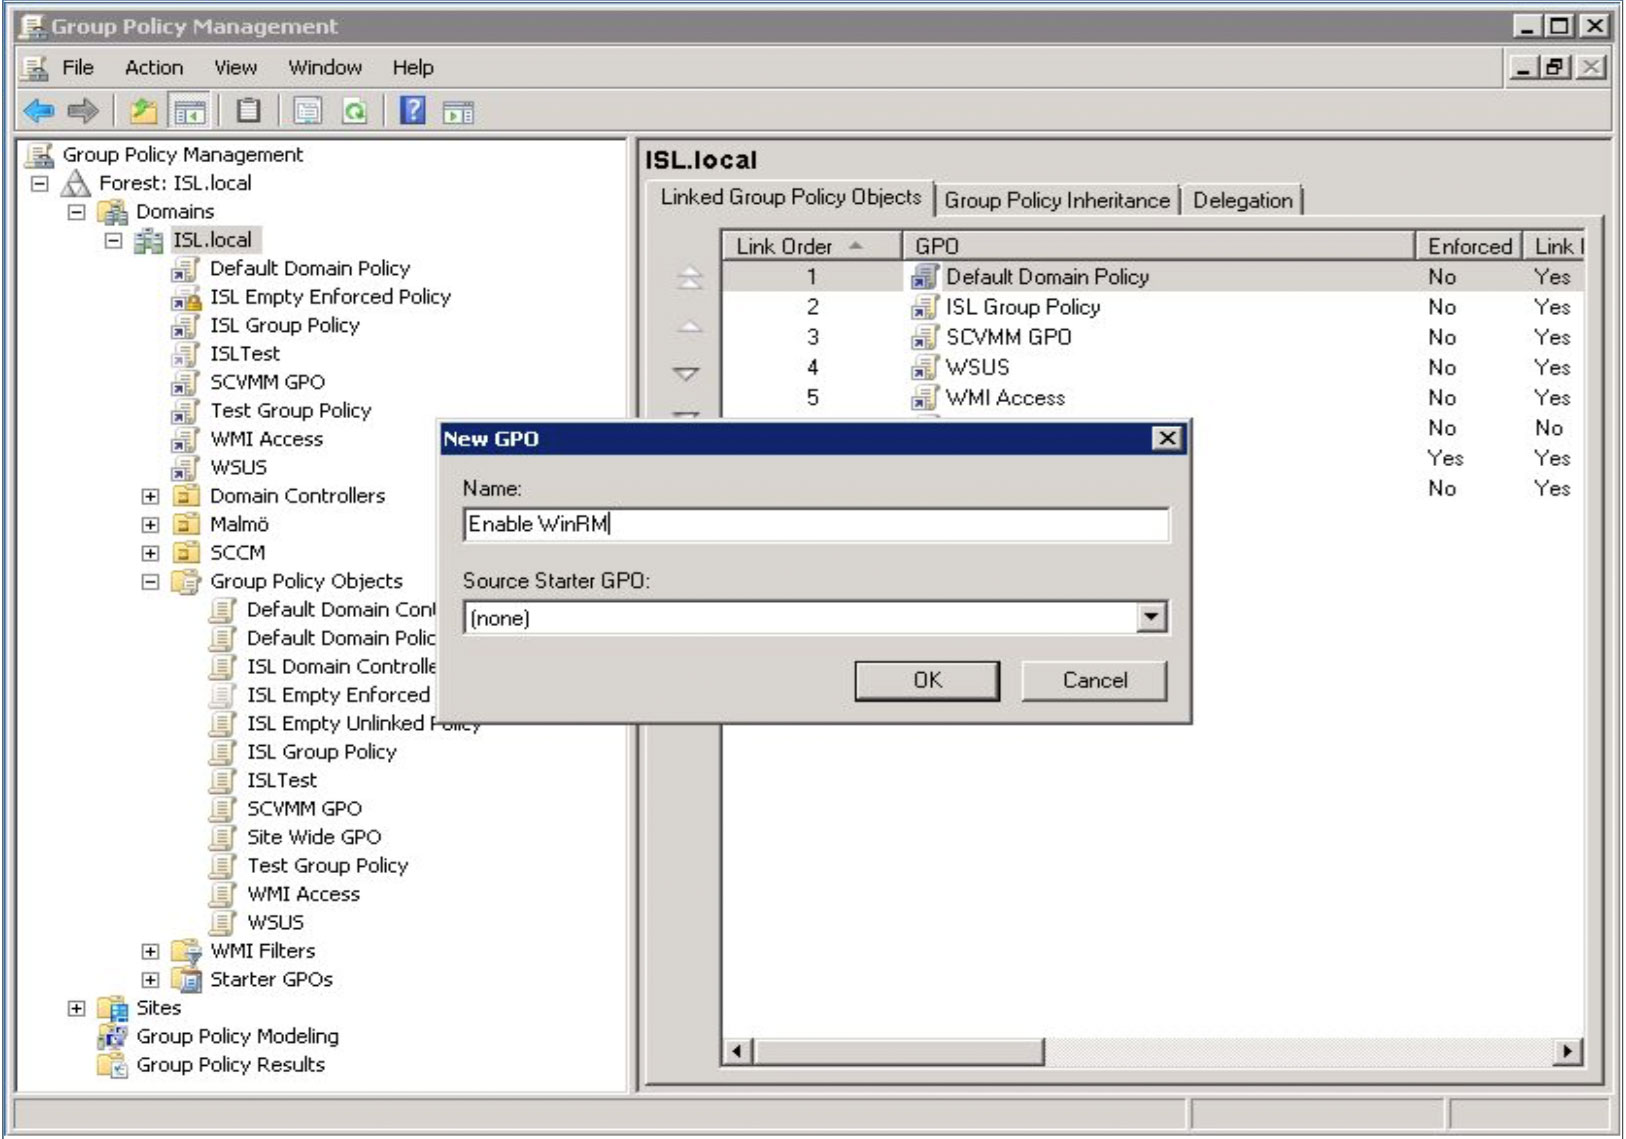
On your AD server, create and link a new GPO to your domain.
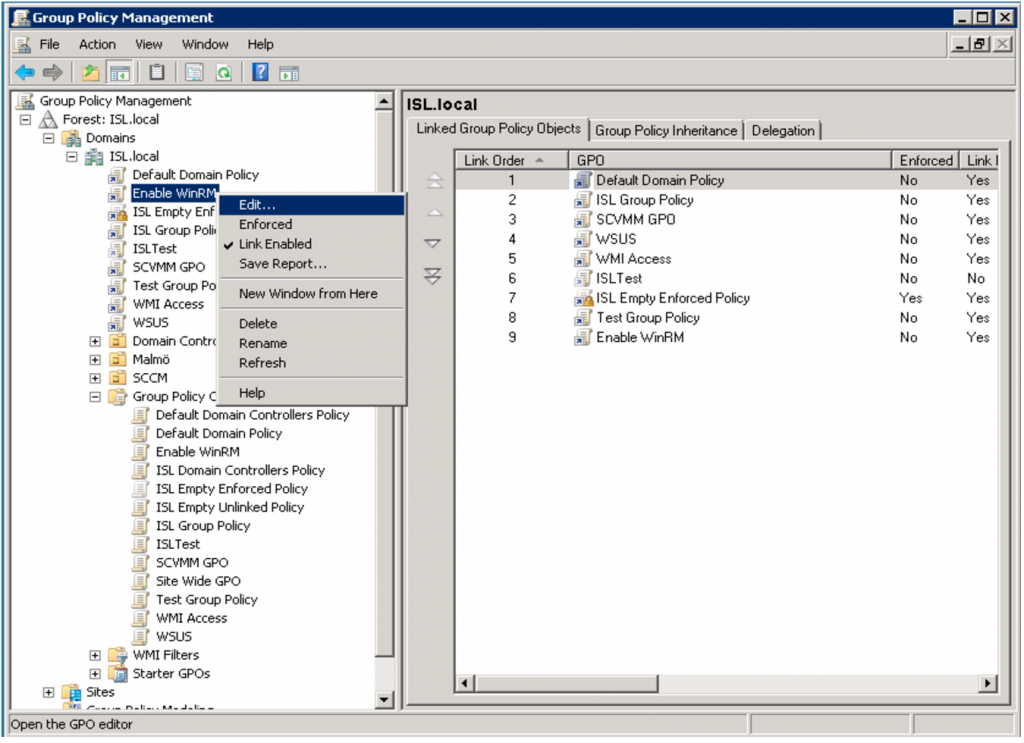
After the GPO has been created, right click it and choose “Edit…”.
Configure the WinRM listener
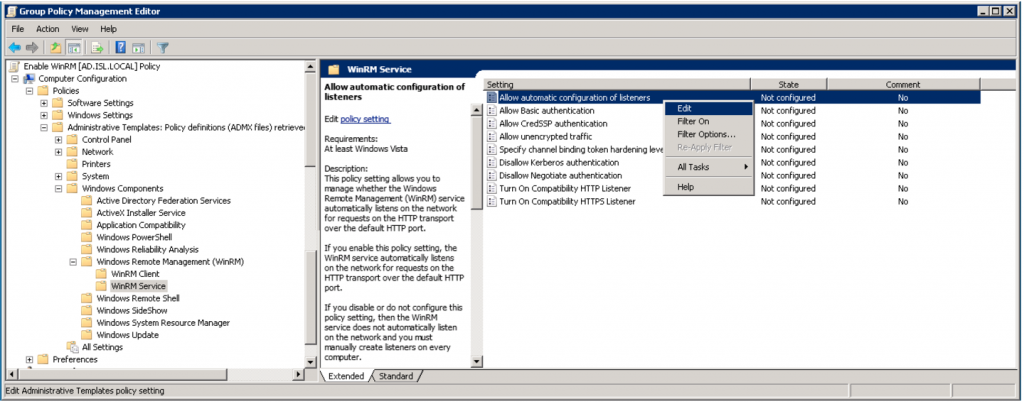
In the Group Policy Management Editor: expand Computer Configuration > Policies > Administrative Templates > Windows Components > Windows Remote Management (WinRM) > WinRM Service.
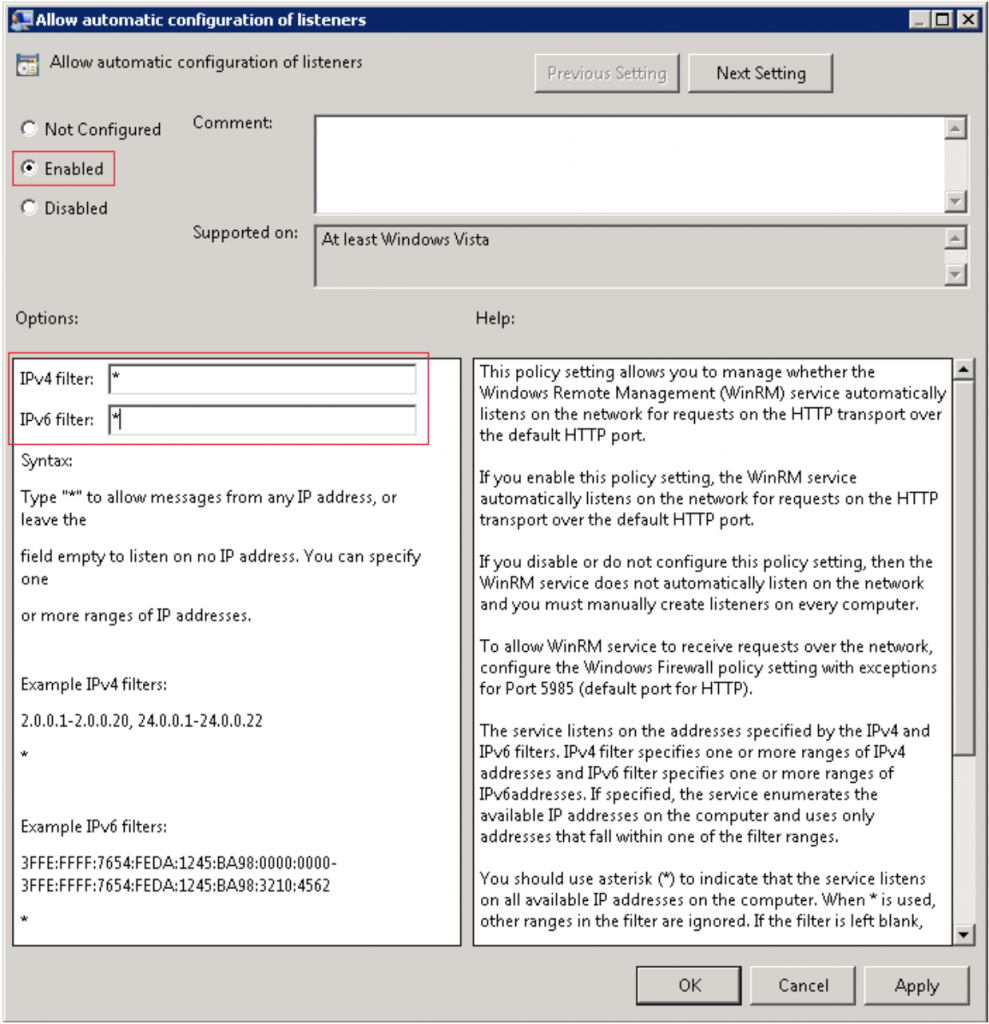
On the right hand side edit the “Allow automatic configuration of listeners” policy setting. The same setting can be named “Allow remote server management trough WinRM” in some configurations.
Here you specify which IP-addresses the WinRM service will listen on. Specifying “*” here means that the service will listen on all interfaces which should be fine.
Automatically start the WinRM service
Next we need to make sure the WinRM service automatically starts on all machines.
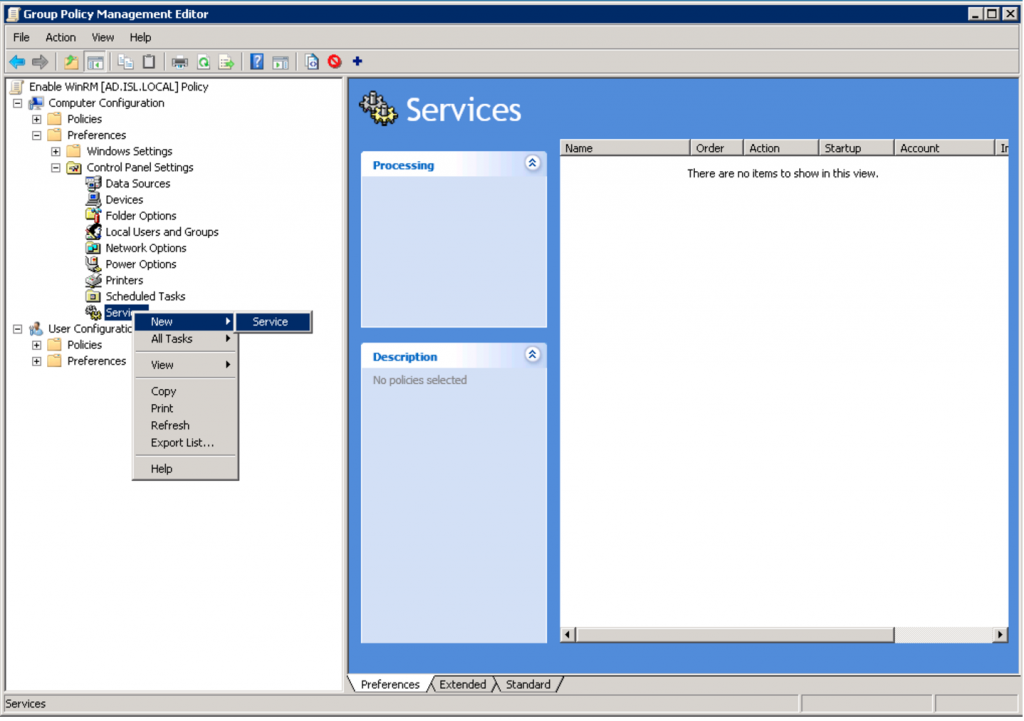
In the Group Policy Management Editor: Expand Computer Configuration > Preferences > Control Panel Settings > Services. Right-click the Services and choose New > Service.
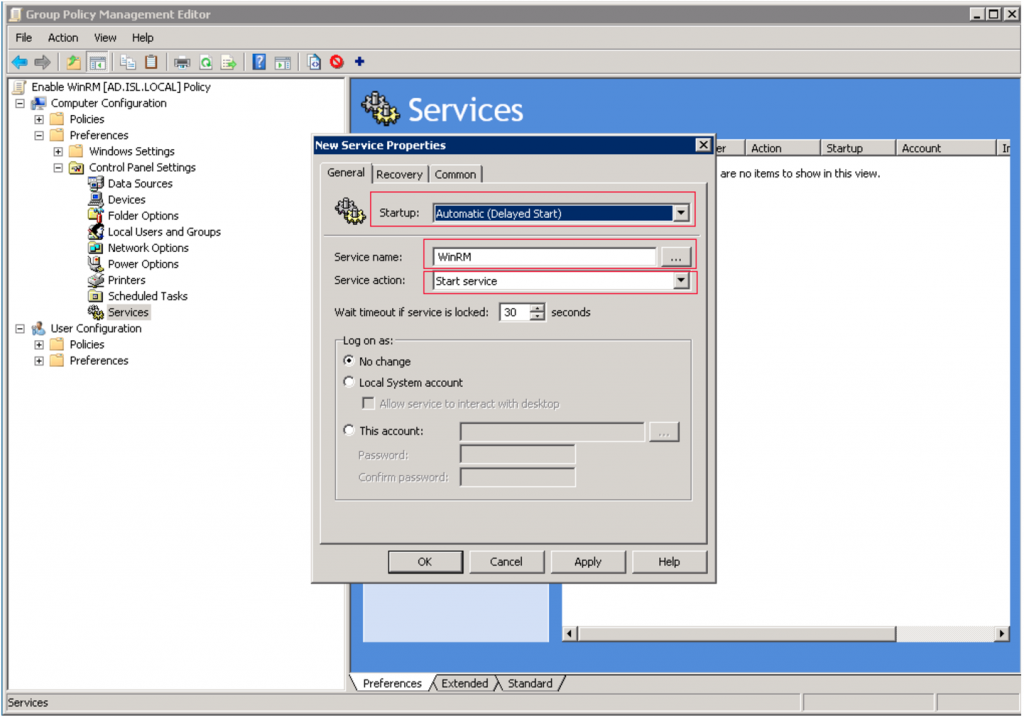
Set Startup to “Automatic (Delayed Start)” and click the “…” next to Service name and search for Windows Remote Management (WS-Management) and select it. Finally, set Service action to “Start service”. Click OK to save the settings.
How to enable WinRM – step 8
Open WinRM ports in the firewall
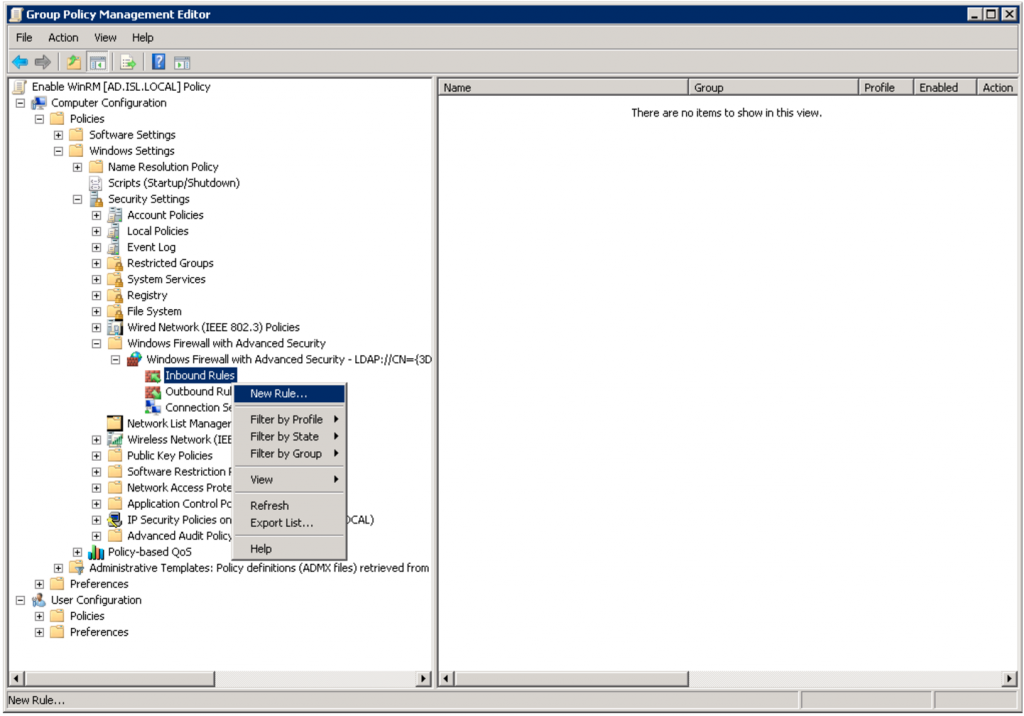
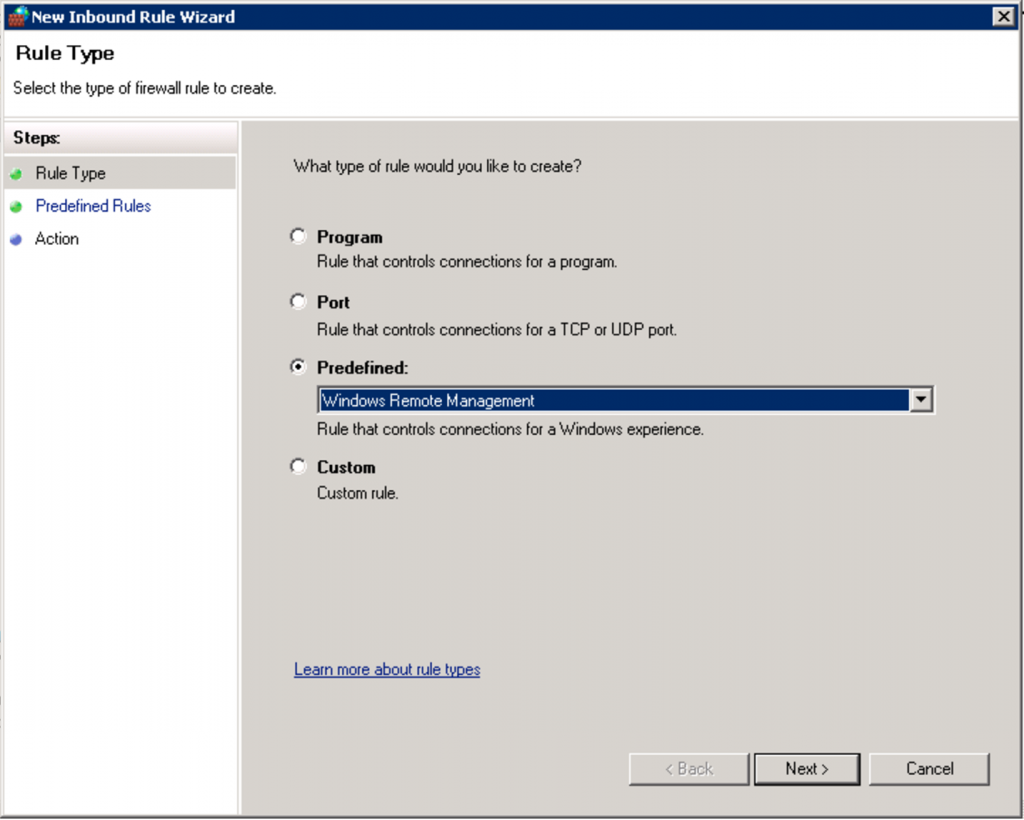
WinRM uses ports 5985 (HTTP) and 5986 (HTTPS). To open the firewall for port 5985, expand Computer Configuration > Policies > Windows Settings > Security Settings > Windows Firewall with Advanced Security > Windows Firewall with Advanced Security > Inbound Rules. Right-click the Inbound Rules node and choose New Rule.
We’ll use a predefined rule so select “Windows Remote Management” from the dropdown and click Next.
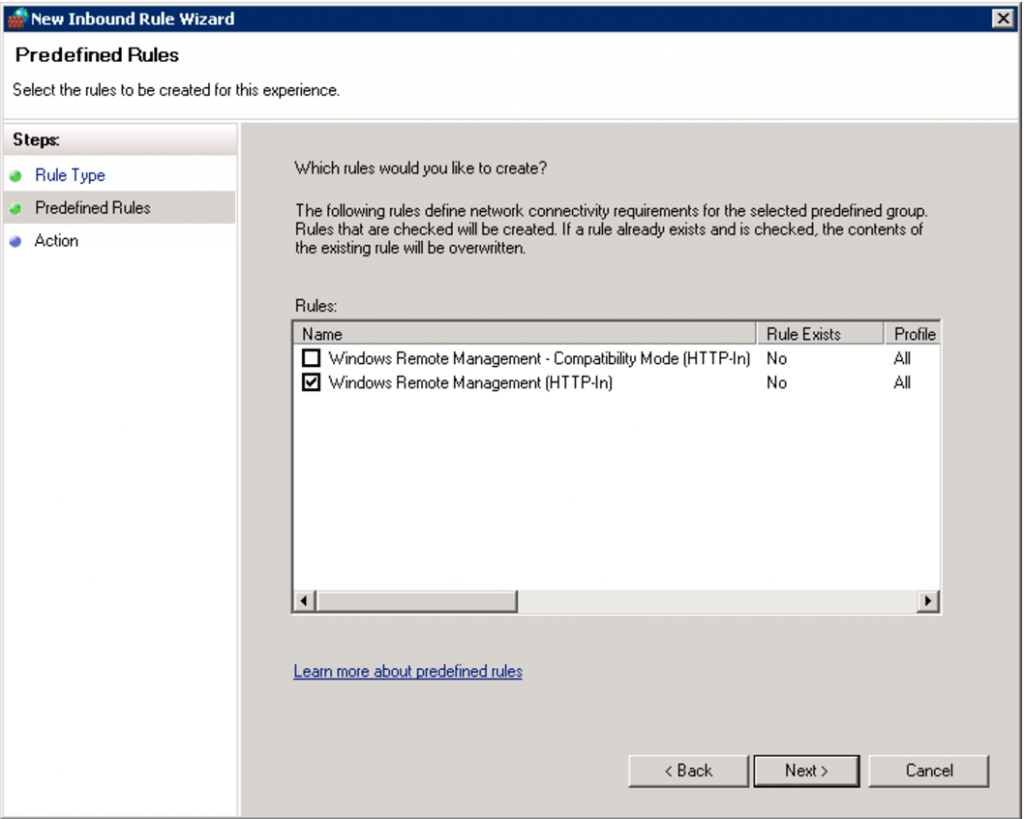
Make sure “Windows Remote Management (HTTP-In)” is selected. We don’t need the compatibility mode. Click Next.
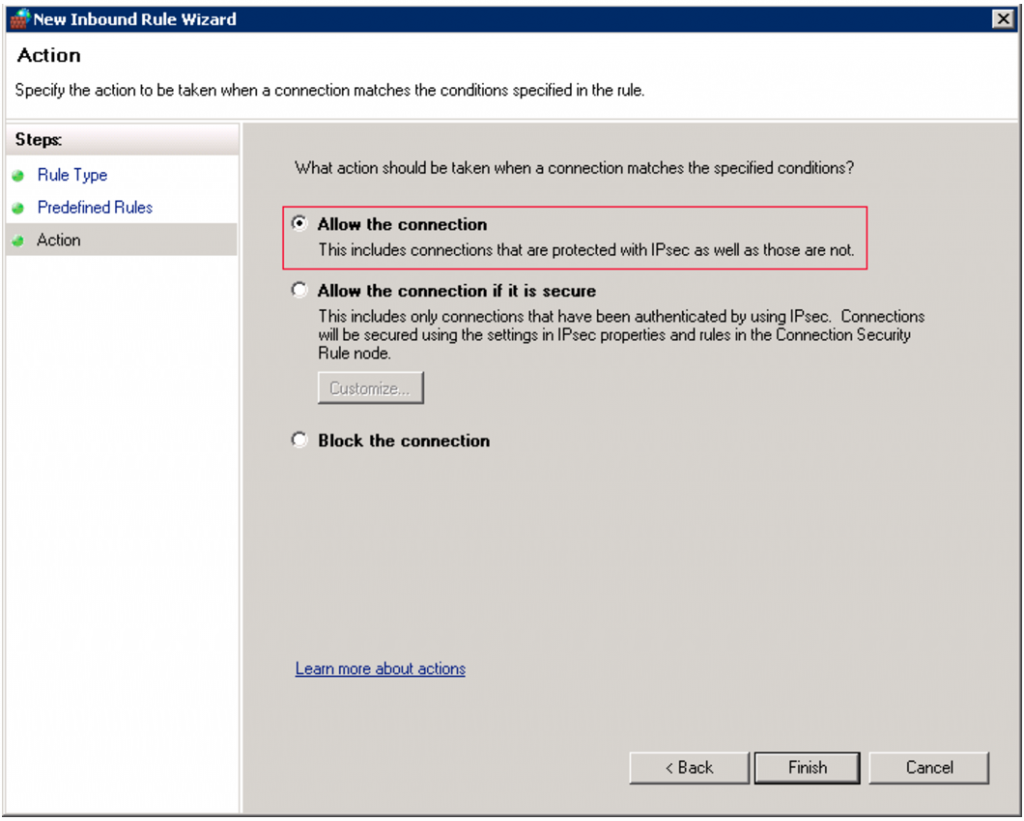
Choose “Allow the connection” as Action. Click Finish.
Verify WinRM settings
Now the GPO is configured and linked to your domain. Either wait for the GPO to propagate to your machines or force an update. To test the configuration on a specific machine, log on to it and run “gpupdate /force” in a command prompt to force update of GPO settings.
Next you can type “winrm e winrm/config/listener” to view the listener settings. Should look something like this:
Test connection
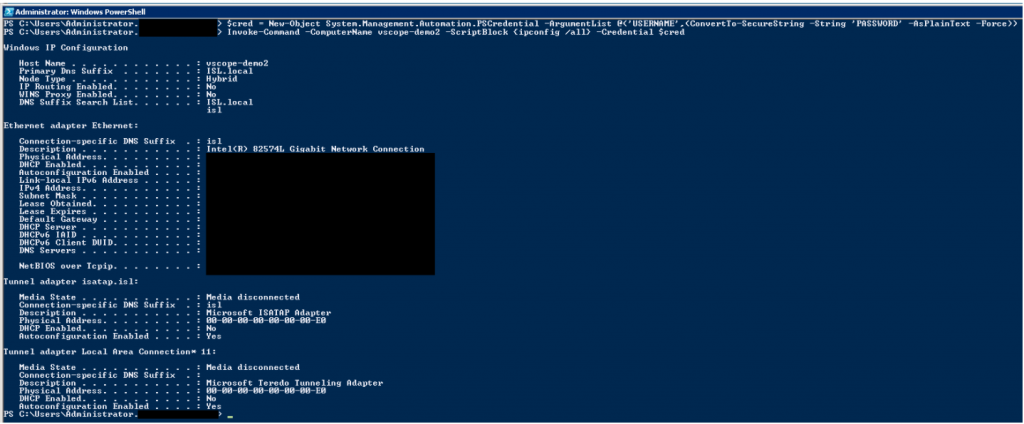
Open up a PowerShell to test a WinRM connection. First, create credentials used to connect to the remote machine. Use a domain account with sufficient rights (preferably an admin account):
PS> $cred = New-Object System.Management.Automation.PSCredential -ArgumentList @(‘USERNAME’,(ConvertTo-SecureString -String ‘PASSWORD’ -AsPlainText -Force))
Replace ‘USERNAME’ and ‘PASSWORD’ with your login information. Next, let’s invoke a remote command on a remote machine. In this example we run “ipconfig /all” on “vscope-demo2”.
PS> Invoke-Command -ComputerName vscope-demo2 -ScriptBlock {ipconfig /all} -Credential $cred
You should see output from ipconfig if all is well.
To enable WinRM in vScope, add a WMI-credential through Discovery Manager and under the “Advanced” section, make sure “Enable WinRM” is selected. This will enable WinRM through HTTP. To use HTTPS (make sure you have configured your machines for this) select “WinRM Use HTTPS”.
Verify credential
To verify the credential used to remotely access WMI use the following powershell script from the vScope server (or proxy server if using)
Get-WmiObject -Class Win32_ComputerSystem -ComputerName 192.168.100.100 -Credential domain\mywmiuser
This command will open up a prompt where you enter the password for the credential. If everything works you should see information about the target machine otherwise an error message will be shown.

